Showing posts with label Dessert. Show all posts
Showing posts with label Dessert. Show all posts
Wednesday, September 1, 2010
Ice Cream Festival
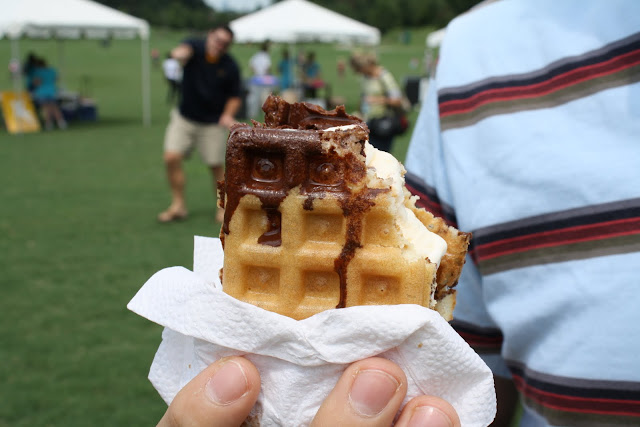
This past Saturday, to celebrate coming back to the city for college, I made a visit to an ice cream festival that was being held in my local park. There were all sorts of different vendors that set up tents and sold bits of their ice cream treats. I tried some mango italian ice and then moved on to this waffle ice cream sandwich.
Two warm, fresh made waffles with a slab of frozen vanilla ice cream in the middle. What a fantastic, creative way to dress up an ice cream sandwich! Of course I said yes when the vendor asked if I wanted it dipped in chocolate.
The answer is always "yes" if you can have it dipped in chocolate.
I'll be trying to recreate these in my own kitchen soon. I've been so busy moving and getting geared up for the next semester that I haven't had much time to blog. I haven't even had time to cook. Frozen pizza has been my dinner on more than one occasion in the past week. I will be back to regular posting soon though.
Any suggestions for quick, inexpensive dinners that I should try in the next few days?
Tuesday, August 24, 2010
Baked Fudge
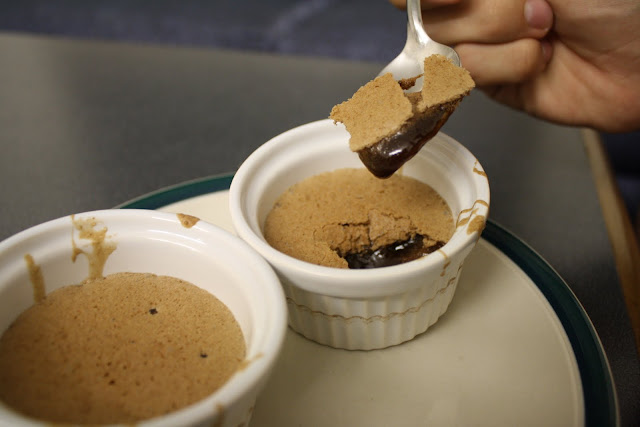
 Baked fudge is one of those desserts that really satisfies your sweet tooth. The ingredients are basic, and the only difficult part of this recipe is waiting for it to bake in the oven before devouring it.
It has a crunch on the top and remains gooey and delicious underneath. This is what warm brownie batter served in perfectly proportioned cups would taste like. It just gets even better when you add a little ice cream or whipped cream on top. Of course this could just be eaten with a glass of cold milk on the side. One of the above options is basically required to get through the chocolate deliciousness of this fudge.

Start out by whipping one egg in a medium size bowl. Then add in half a cup of sugar and make sure it all gets combined.

Then, add in 1 tbsp of cocoa powder and 1tbps of flour to the mix. Add in 1/4 cup of melted butter as well. Then whisk it all up until it forms a smooth mixture with all the items combined.

I find this recipe fills four of my ramekin cups perfectly. You want the mixture to come up about half way in whatever baked cups/pan you decide to use. I just prefer these so you can have easily proportioned containers (which I then eat two of, of course).

Place the ramekins in a baking pan and fill the pan with water so that the water comes half way up the sides of the cups. You can use whatever pan size or shape you would like, just be sure to fill the water half way up the side of the cups. Then place the pan with the cups inside into the oven set at 325 degrees for 40 minutes.

This will be a long 40 minutes, but believe me when I say that it is worth it.

Thursday, July 29, 2010
Brownies

For my first blog post I am going to keep things simple with a good, old fashioned brownie recipe. These are not only chocolaty and delicious, but also so easy to make, that you will never go back to a box mix again. No fancy equipment needed. Just a saucepan, bowl, baking pan and viola! 40 minutes later you are done.

Brownies
Based on a recipe from Tasty Kitchen
Ingredients:
1 1/2 cup flour
1/2 teaspoon baking soda
1/2 teaspoon salt
2/3 cup butter
1 1/2 cup granulated sugar
4 tablespoons water
24 ounces semi-sweet chocolate chips (about 2 packages)
4 whole eggs
Start by preheating the oven to 325 degrees. In the saucepan, heat the butter until just melted and then add the sugar and water. Bring this mixture to a boil and then remove immediately from the heat. If it gets too hot, it will scald the chocolate which does not make good brownies!
Stir in the packages of chocolate chips until they are all melted. Then, whisk the eggs into the mixture one at a time, making sure each is well incorporated. If you add them all at once its much harder to reach the consistency you want.
Mix the remaining dry ingredients together in a separate bowl. No need to sift the mixture, just make sure to stir all the ingredients together before slowly adding it to the chocolate mixture.
Once everything is mixed, pour the mixture into your greased 9'x13' baking pan and put in the oven for 30 minutes. You know the mixture is done with you insert a tooth pick (or a fork in my case) and it comes out clean.

It's best to let the finished brownies cool for an hour or two before eating, but I can never wait more than five minutes before digging in. But then again, I love eating that ooey gooey warm brownie consistency. If that's not your thing, just put in the refrigerator for 20 minutes to help speed up the process. You aren't going to want to wait to dig into these delicious treats!
Subscribe to:
Comments (Atom)
